Showing posts with label TIPS AND TRICKS. Show all posts

Wednesday 3 February 2021

How to make a professional thumbnail using mobile 2021

HOW TO MAKE A PROFEESIONAL THUMBNAIL

How to make youtube thumbnail on phone
HD Youtube thumbnail kaise banaye mobile me


I'm gonna show you the list that I put together for the best apps to create YouTube thumbnails with. And it's gonna work on both Android and iPhone for all of the apps.

 But before we jump into that I want to hear from you. Go down, leave a comment below, let me know what app you're currently using to make thumbnails with. Then if you're new to the channel, drop a #New followed by your question or comment. I read every single question and comment and I reply to as many of them as I can. And when this Article is over I'm gonna go down there and carry on the conversation. And of course, if you're not yet a Follower, hit that FOLLOW button followed by the notification bell so you don't miss anything, including future Article that are gonna help you master your mobile. Let's dive headfirst into the first app. PicMonkey. PicMonkey is a really easy app to use. It's probably the simplest app to use on this entire list. You basically open it up, you pick your canvas size, you drop a background color on it, and you add your text and you add your pictures and away you go. It's super easy to use, so download it see if it works for you, see how you feel about it. I think it's a great app,

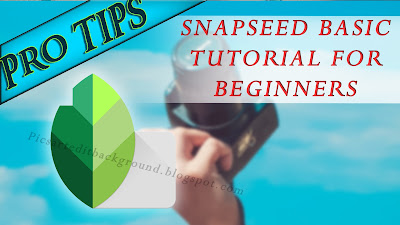
 but I don't like it as much as the number two app, which is Snapseed. And that is my all time favorite app. If you've been on my channel for any length of time, you know that Snapseed is the champion when it comes to photo manipulation, and photos in general. And I highly highly highly recommend Snapseed. I'm gonna put a link to a video that I did right there. Where I walk you through making a simple YouTube thumbnail using Snapseed. And by the way, Snapseed is free, no ads, and in my opinion, it shouldn't be free, but it is. So when this video is over download Snapseed, see how that works for you. My hunch is that you're probably gonna love it, and don't forget to watch the video that I just linked. Next up is Canva

Canva is a template based system. It's a free app, it does have some paid templates, but you have tons of free ones to choose from. They also have a website you can go on, Canva.com. How Canva works is, after you download the app, you browse through their free templates. You choose one that you like, and you can change the text, you can change the background pictures. You can adjust it in any way shape or form that you want. Or you can just start with a blank canvas. Now Canva,

 In my opinion, is the perfect app for somebody who's just getting started and they're kind of intimidated by a blank canvas. So check out Canva or Canva.com if you wanna start with a pre-made template. And by the way though this is not a thumbnail if you're interested in YouTube header art. I made a video that I'm gonna link to right here, where I take Canva and walk you through how to make a YouTube header or channel art. Now I need to mention that it's important when you're using any of these apps, a proper aspect ratio for a thumbnail on YouTube is 16 by nine. And that's what give you the ratio that you see right here when you're watching an HD video. 16 by nine, not nine by 16, that's something you're gonna use for IGTV, which is gonna put it in a vertical format. So 16 by nine. That's the ratio that you always want to use when creating a YouTube video. Next up is an app called Fotor. And you might not have heard of Fotor, and to be totally honest with you, this is an app that I'm gonna make a standalone video on, and I'm gonna show you how to do thumbnails and YouTube channel art. But for this video I just want to mention it so you can download it, check it out and get comfortable with it. So when my video comes along, where I teach you how to do a thumbnail or channel art You know exactly how to use the app. It is a super powerful app, it's one of my personal favorites, check it out. Next up is what I believe is the most powerful, all around app that you can possibly have on your phone if you're on YouTube, and Instagram and IGTV. It is a free video editor. It is a free photo editor. You can make your thumbnails. 

You can edit vertical video for IGTV. This app is a powerhouse, it's called InShot. You want this on your phone if you're working on multiple platforms, trust me on this. Amazing app. The text options inside of InShot are incredibly powerful too. You have lots of options there, lots of control. It's a fantastic app. This is an app that you're gonna put on your phone for sure if you're on YouTube, Instagram and IGTV. It is kind of a catch all app that does everything, and it's free. How cool is that? All of these app are free. Of course, some of them have paid versions if you wanna remove the ads. But you can use the apps for free. So that's what we focused on today. And of course there are other honorable mentions that maybe should have made this list, but I'm sticking with five. And that's PixelLab and PicsArt. Both are awesome awesome apps, maybe I'll cover them in a future Article. And if your app didn't get on this list today leave a comment down below, let me know which app it is. But keep in mind, today's apps were free apps. 

So I didn't want to list Photoshop and Lightroom, some of the Adobe products and some of those. Free apps only if I missed on some good ones leave a comment down below.

Tuesday 2 February 2021

Snapseed basics tutorial for beginners 2021

Snapseed basics tutorial for beginners 2021

Snapseed basics tutorial for beginners 2021
Snapseed hd editing tips


Today I'm gonna show you a few simple steps that will make any photograph or YouTube thumbnail that you're working with come to life and pop, and it's really easy to use. And to do this, we're gonna use the Snapseed app, which is totally free.

There are no ads, and it's available

on both Android and IOS devices.

And if you don't yet have this on your phone,

you need to put this on your phone.

For the tutorial that I'm gonna do today,

it is gonna be a basic entry-level tutorial,

if you're not that experienced with Snapseed

or you're not quite sure what to do with it.

The first image that we're gonna edit today

is gonna be a photograph of a woman,

and the second image that we're gonna work with

is a photograph of food.

But it doesn't matter what sort of image that you have.

What I'm gonna show you today applies to everything.

And gamers, this applies to you, too.

You can take screenshots of your gameplay,

walk through the steps that I'm about to show you,

and make your images look a lot better.

This is the sort of thing you want to do

when you're using your gameplay images for your thumbnails.

So let me open up Snapseed and show you how this is done.

So when you open up the Snapseed app,

you want to choose a photo out of your Gallery to work with.

The first photo we're gonna work on

is a portrait of a woman.

So I'm gonna tap on that, and she's gonna open up.

Down here on the very bottom you're gonna see

Looks, Tools, and Export.

We're gonna tap on Tools,

and it's gonna load up a bunch of tools here.

The first tool that we wanna work with in this tutorial

is on the top left, and it's called Tune Image.

You wanna tap on that.

Now if you push your finger on the screen

and move it up or down, a menu's gonna pop up.

You're gonna see Brightness, Contrast, Saturation,

Ambience, Highlights, Shadows, and Warmth.

This is the main thing.

This is the juice that's gonna make your photo come to life.

So the first thing that I'm gonna do

for this particular image,

because it looks a little cold,

and it doesn't really pop,

is I'm gonna change the brightness.

And I'm gonna go into Ambience,

I'm gonna add some saturation and warmth.

Now to add these, once you select one,

you simply move your finger to the left or to the right.

As you see here on the top,

the brightness numbers are changing.

So I'm gonna add just a little bit of brightness.

I'm gonna press down and get to the next one,

which is Saturation.

I'm gonna move to the right,

give it just a little bit of saturation.

I'm gonna hold down again, go to the next one,

which is Ambience.

I'm gonna go to the right again, add some ambience.

I'm gonna push down again.

I'm gonna go down to Warmth, go to the right.

Now you see what's happening here as I change these.

It's adding a lot of color to the image.

So I'm just gonna play with these a little bit

until I find a look that I like.

Now any time along the way, if you're curious

where you started and where you're at now,

on the top right you can tap on this little icon here,

and it's gonna show you where you started.

So this is where we started, and this is where we are now.

You can see the image comes to life quite a bit.

So I'm happy with this.

And on the bottom-right-hand side,

I'm gonna tap on the check mark to save it.

Now I'm gonna go back down to Tools.

I'm gonna go down and find the Portrait icon.

I'm gonna tap on that.

Right away it's gonna analyze the photo.

And what it's gonna do,

it's just gonna add some smoothness to the skin

and some whites to the eyes.

So if I use two fingers to zoom in

and then I go to the top right

to see what it looked like before and after,

this is before and this is after.

You can see what it's doing to the face.

It's really bringing some clarity to the face

and some whites to the eyes.

It's smoothing the skin quite a bit,

and I like the way this looks.

Now if you want to adjust this,

you're gonna go down to the bottom center to the levels.

You're gonna tap on that, and you can adjust any of this.

So if you want more whiteness to the eyes,

you can simply go to the left or to the right.

If you want to smooth the skin out more,

you choose that and got to the left or to the right.

Now I'm gonna zoom back out using two fingers,

and I'm gonna go to the top right again

to see where we started.

And you see what it's doing?

It's putting a focus on her face and lighting it up

and putting whiteness to the eyes,

and I like this a lot.

Now after each tool adjustment is saved,

you can tap and hold on the image,

and it's gonna show you where you started

and where you are now.

And you can see, this is a drastic difference.

You can see the color that it's adding.

And it looks a lot better.

The blues are coming out.

And this is the sort of thing

that you wanna do with your pictures.

And it doesn't matter if you're on Instagram

or sending these out on Facebook

or using them as a YouTube thumbnail.

If you want to make awesome  photos

and really make them pop, this is how you do it.

Now I'm happy with this, but I'm gonna play with it

just a little bit more.

I'm gonna go back down to Tools,

and I'm gonna scroll down to Vignette.

I'm gonna tap on that.

And it's gonna add a little bit

of vignette around the edges.

The first thing I'm gonna do

is come down to the Inner Brightness,

and I'm gonna brighten up the center just a little bit.

Then I'm gonna tap and hold, and do Outer Brightness.

And I don't want such a heavy vignette,

so I'm gonna back it off just a little bit.

And then I'm gonna save it.

Right, you can see, this is quite a difference.

This really makes the photo come to life.

So I'm happy with this, and this is as far

as we're gonna go on this first tutorial.

We'll get into the more advanced things a little bit later,

but for this I just want to walk you through the basics.

So we want to save this image

by going to the right corner and click on Export.

And here you'll get some options on how you wanna save it.

For this normal photo, I want to save a copy of the photo.

So I'm gonna tap on that.

It's gonna run through all the filters.

Then it's gonna tell you that the photo is saved,

and you can go on and use the photo anywhere you want.

Now before I move on to the next image,

I want to hear what you think about Snapseed

or what your favorite photo editor is.

Do you use Snapseed?

Do you use PicsArt?

What do you use?

Go down, leave a comment below.

I read every single question and comment,

and I reply to as many of them as possible.

And when this video's over, I'm gonna go down there

and carry on this conversation and find out

what your favorite photo editing apps are.

Now let's move on to the next image.

Now for the food photo,

we're gonna walk through the same process,

but I'm gonna show you how to highlight certain colors

to add some more color on the  colors.

And I just love Indian food.

I'm just gonna tell you that right now.

So I'm gonna go back to Tools down here in the bottom.

I'm gonna go to Tune Image,

and the first thing I'm gonna do

is I'm gonna add a little brightness.

I'm gonna come down.

I'm gonna add some saturation.

I'm gonna add some ambience.

Look at that right there.

Just ambience by itself, I mean,

look at what that does to colors.

This is the sort of thing that you want to do,

especially with your YouTube thumbnails.

So I'm gonna add a little bit of ambience.

I might add some warmth.

Then I'm gonna go down to the bottom right,

and I'm gonna save it.

I'm gonna go to Tools.

Then I'm gonna come down, and I'm gonna find

this Selective tool, which is right here.

I'm gonna tap on that.

And the way this works is anywhere I tap,

it's gonna drop an anchor.

So I'm gonna use fingers and zoom in,

and I'm gonna drop an anchor right here on this red area.

So you see it's a B.

What that means is it's Brightness.

So if I tap and hold and move my finger,

I can change the brightness, contrast,

saturation, or the structure.

I'm gonna change the saturation of this red area.

So that point is dropped, and I'm just gonna simply move my finger to the right, and you see the red is changing. If I move it to the left, it goes the other way. So I'm gonna crank this up, because I want this red to pop. Now that this anchor is set, and the saturation is there, I'm gonna hit the check mark and save it. I'm gonna zoom out a bit. I'm gonna move it around. I'm gonna change the color of this, so I'm gonna go back, Selective. I'm gonna drop that right there and practice this regular..

Friday 17 January 2020

How to use picsart tools | Picsart me photo kaise banaye hindi me jaane

HOW TO USE TOOLS IN PICSART 2020 IN HINDI

Picsart tools detail 2020

Hey guys welcome to SR CREATIONS

So guys aajke is post me mai aapko bahut hi khas aur jaruri jaankari dene jaa raha hu agar aap ek photo editor ho and mobile me photo editing karte ho tabto aapko picsart studio app ke baare me pata hi hoga kuki picsart me hi ham apne android phone se kaafi behtr photo editing kar sakte hai and guys aapko is app me kuch hi tools ya effects ko use karna aata hoga aap saare tools picsart ke use karna nahi jaante honge so isiliye maine aaj ke is post me aaplogo ke liye ye post likh rha hu khaas karke mere un editor bhaiyon ke liye jo abhi abhi picsart me apna photo editing karna sikh rahe hai aur unko ek accha photo editor banna hai so doston aap is post ko pura padho and aapko puri tarah se samjh aajayega and aap video bhi dekh sakte ho jisme ki aapko step by step maine bataya hai hindi me..

Sabse pehle to agar aapke paas picsart app nahi hai to abhi download karlo

DOWNLOAD PICSART LATEST

Is post me ham baat karne wale hain jin tools ke baare me unko dekh lijiye -


PICSART TOOLS


  • CROP TOOL
  • FREE CROP TOOL
  • SHAPE CROP TOOL
  • DISPERSION TOOL
  • CLONE TOOL
  • STRETCH TOOL
  • MOTION TOOL
  • SELECTION TOOL
  • CURVES TOOL
  • ADJUST TOOL
  • ENHANCE TOOL
  • TILT SHIPT TOOL
  • PERSPECTIVE TOOL
  • RESIZE TOOL
  • FLIP/ROTATE TOOL

So guys jaise hi aap apne picsart app ke second option TOOLS me click karte ho to aapko 15 Tools dikhte hai jinko kaise use karte hain aur inka use kya hai ye ek ek karke aapko bataunga us post me must read.


1.CROP TOOL: Guys picsart me sabse 1st number me aapko Crop tool dikhega jiska use aap apne

                              apne photo me croping/cut karne ke liye kar sakte ho.


2.FREE CROP TOOL: Dosto jaise aapko ye tool 2nd number me dikh jayega and iska use bhi                               same photo cropp karne ke liye hai lekin aapko isme thoda advance option milega jisse ki aap brush tool se apne photo ke kisi bhi hisse ko select karke png me save kar sakte ho.


3.SHAPE CROP TOOL: Is tool ka use aap apne liye Logo banane me kar sakte ho kyuki is tool me                           aap apne photo me koi bhi shape bana sakte ho and apne logo bhi create kar saktte ho.


4.DISPERSION TOOL: Guys is tool ka use karke aap splatter effect daal sakte ho apne photo me.


5.CLONE TOOL: Guys ye cone tool bahut kaam aate hai apne photo me picsart ka ye tool aap apne photo me pimple hatane ke liye kar sakte ho ya apne photo ka clone banane ke liye yaa to aap apne photo me kisi unwanted object ko hatane ke liye kar sakte ho.


6.STRETCH TOOL: Is tool ka use ham cb hair create karne ke liye jaise apne photo me hair styke stretch kar sakte hain and funny image create karne ke liye kar sakte hain kyuki is tool me aap image me kisi bhi object ko stretch karke badaa ya chota kar sakte ho ya fat/thin kar sakte ho.


7.MOTION TOOL: Guys is tool se aap apne image me motion effect daal sakte ho jaise south indian movie me action ke time hero ka body 3/4 layer me hojaa hai slow motion me isiliye iska name motion hai.


8.SELECTION TOOL: Is tool ke help se aap apne image me kisi bhi area ko select karke copy kar sakte ho and dublicate bana sakte ho aur us selected area me effect add kar sakte ho.


9.CURVES TOOL: Guys is tool se aap apne image me cb editing ke liye brightness aur contrast and shadow ye sab add kar sakte ho to aapke image me and high quality me brightness increase hoga.


10.ADJUST TOOL: Guys is tool me bhi aap apne photo me brightness,contrast,shadows,highlights,saturation ye sab increase kar sakte ho and aapke image me lighting laa sakte ho and retouch bhi karne ka accha tarika hai.


11.ENHANCE TOOL:  Doston is tool me aapke photo me temprature ke saath saath brightness and saturation bdha sakte ho.


12.TILT SHIPT TOOL: Dosto is tool se aap apne image me blur effect add kar sakte ho.


13.PERSPECTIVE: Is tool ka use karke aap apne image me rotation,flip kar sakte ho.


14.RESIZE TOOL: Guys is tool ki madad se aap apne image ko high resolution me resize kar sakte ho jisse ki editing karne par aapka pic ka pixel na fate.


15.FLIP/ROTATE TOOL: Friends jaise ki iske name se hi pata chal rha ki aap is tool se apne image me flip and rotate kar sakte ho.


So guys isi tarah se aap in tools ka use kar sakte ho.


Comment kar sakte ho agar koi pareshani aati hai to

Search by keywords -
(in hindi) How to use picsart all tools| Picsart all tools detail in hindi 2019picsart hd background picsart hindi font picsart hindi picsart hindi font download picsart hindi png picsart in hindi picsart editing hindi picsart editing in hindi picsart tools in hindi picsart tricks in hindi picsart tutorial in hindi hindi english picsart png hindi movie picsart hindi open picsart hindi pic picsart hindi picsart editing photo how picsart hindi how use picsart in hindi picsart app hindi picsart app hindi download picsart attitude status hindi picsart background indian flag picsart background indian girl picsart editing tips hindi picsart fonts in hindi picsart hindi english mix png picsart hindi english text png picsart hindi font free download picsart hindi font ttf picsart hindi font zip file download picsart hindi gana picsart hindi mai picsart hindi movie download picsart hindi picture picsart hindi status picsart hindi text picsart hindi text png picsart hindi video picsart indian background picsart information in hindi picsart logo hindi picsart meaning in hindi picsart minions photo editing hindi/urdu picsart photo editing video hindi picsart png hindi english mix picsart png hindi text picsart png quotes hindi picsart png status hindi picsart png text hindi english mix picsart status attitude hindi picsart status in hindi picsart status png hindi picsart use in hindi picsart video hindi mai png text effects for picsart hindi text png for picsart hindi

Top 5 background eraser apps for android 2020| Top 5 Best Background Eraser Apps For Android And iPhone

TOP 5 PHOTO BACKGROUND ERASER APPS FOR ANDROID 2019

Dosto aapka firse swagat hai hamare website me dosto mai hu apka friend SR and aaj mai aapko batane ja rha hu 5 aise android apps ke baare me jiska use karke aap apne android phone me photo editing ya photo edit se related kuch bhi karte ho to is app ka use karke koi bhi image ka background bahut hi easily erase kar paoge and bahut aashani hogi photo editing me jaise aap koi banner banate ho apne phone me to aap apne photo se background erase karne ke liye bahut se apps ka use karte honge lekin fir bhi thikse photo ka background erase nahi hopata aur banner jo aap bana rahe hai usme aapke pic me jo bhi background hota hai usme se aapke jo body hota hai photo me usme outlines aajate hai aur sharphness type erase hota hai aur hame smoothnesh wali background erase hua pic chahiye hota hai to guys aapko tention lene ki jarurat nahi hai aaj mai aapko aise 5 top background eraser app ke baare me bataunga jisme aapko kaafi jyda madad milegi to chaliye doston ham aage dekhte hai 5 kounse apps hai jisme aap apne pic ka background bahut hi easily erase kar skte ho dosto aapko ye post pasand aaye to mere channel ko subscribe jarur karen and follow our website for all backgrounds and png to chaliye aage dekhiye kounse wo apps hai..

So guys isme maine jo bhi apps bataye hai sab aapke bahut kaam aayenge aur ye sabhi bilkul free apps hain jo android me playstore me aasani se mil jayenge so aap inko download kar paoge...

1. BACKGROUND ERASER APP

    Guys ye application sirf photo background erase karne ke liye banai gayi hai isiliye isme bahut se features diye gaye hain jiski madad se aap apne photo ke background ko erase karke usme dusre backgrounds add kar sakte hai jo ki aap is app se apne photo ka png ya stamp type save karke dusre apps ki madad se manipulation editing kar sakte ho.

FEATURES:

So guys ab baat aati hai background eraser app ke features konse hai jisme aapko easily background erase karne ko milta hai to isme aapko 6 options yaani features dekhne ko milte hai jo hain-


  • Bg Colour
  • Extract
  • Auto
  • Manual
  • Repair
  • Zoom

 BG COLOUR use of bg colour on background eraser app, Dosto mai aapko bata raha hu ki aapko is app ke bg colour wale option ko kaise use karna hai, to aapke pic me agar ek colour me hi background hai jaise aap kisi wall/diwar me photo click karaye hai to aapko bahut aashani hogi apne pic ka background erase karne me jisme aapko apne background ka colour select karna hai jaise aapke pic ka background green hai to aap bg colour me green colour select karke ashani se erase kar paoge..


EXTRACT using extract option on background eraser app, guys ye bhi ek bahut accha feature hau jisme aap apne image me us area ko select karle jis area ko aapko extract karna hai aur wo area blue colour me hojayega aur wo area jaha pe red colour me hai wo sab erase hojayega and aapka pic extract hojayega..
AUTO Doston ye apne liya banaya gaya hai kyuki hame apne se photo ke background me haath ghumana aur time pass karna bilkul pasand nahi aata to ye feature kaafi shaandar hai jiske name se hi malum hota hai ki ye auto erase karega to hn guys sahi samjhe aaplog ye option apun logo ke liye hi hai hehe thoda bantai language me bol diya, So friends is feature me aapko bas us area me click krna hai jaha aapko erase karna hai to jaha tak is app ko lagega ki background erase karna chaiye ye us area ko erase kardega only in one click..
MANUAL Ye option auto tool ke bilkul ulta hai jisme aapko name se hi pta chal rha hoga ki isme manualy sab kuch karna padega to ji hn isme khudse hame 4 se 5 minutes leke apne pic ka background erase karna hoga jo sabse boring kaam hai...
REPAIR waise iska jyda kaam nahi hai fir bhi aap galti se kabhi apne pic ka wo part jaha aapko erase nahi karna hai aur erase hogya to image ko wo part ko repair karne me ye feature kaam aata hai jiske name se hi pata chalta hai ki ye background repair ka kaam aata hai...
ZOOM doston isme apne pic ka wo area zoom karke erase kar sakte ho jisko aapko erase karna hai to aap zoom karke erase karte ho tab to ekdam sahi se erase karoge bilkul professional background erasing..


So doston aapko ye app pasand aaye to comment me jarur batana ab aage badhte hai apne dusre app me so our 2nd app is


2.PHOTOSHOP EXPRESS (PS TOUCH)

  Friends is app ko sab jaante hain ye kyuki ye app computer me pehle se hi hai jo ki kaafi famous hai aur ye google ka hi app hai jisme aapko high quality photo editing filters and high performance dekhne ko milega guys waise to ye ek professional photo editing app hai aur isme sabhi filters diye gaye hain lekin mai aapko is app ke us feature ke baare me bataunga jiska mai is article me baat kar raha hu jo hai background erasing app so isme aapko aur bhi aashani and professional background eraser milenge jisme eraser ke bhi 2 options hai jisko ham aage padhenge ki kaise iska use karna hai so aage jarur read kijiye...


FEATURE FOR ERASING


  • Eraser brush
  • Quick selection tool

ERASER BRSUH Guys ye feature hame sabhi editing apps me dekhne ko milte hain lekin is app me aap iska use karke dekhna aapko maza aajayega jisse aap apne iamge ko kaafi professional tarike se aur easily background ko erase kar paoge jisme bilkul smoothnesh ke saath erase hoga background but guys usme thoda time lagta hai and aapko isme bor bhi lag sakta hai kyuki isme aap ko manually haath se slide karke erase karna padta hai aur ye to kaafi slow process hai lekin jis process me jyda time lagta hai wo utna hi jyda acche se hota hai to isko aap use karke dekho and comment me jarur batana ki kaisa laga to chaliye quick selection tool ko bhi bata deta hu..
QUICK SELECTION TOOL Guys jiska aapko intezar tha wo yahi tool hai jisme aapko jara sa bhi mehnat karne ki jarurat nahi padne wali isme aap apne pic me se apne body wale part ko ya apne image se jis pat ko extract karna hai us part ko select karlena hai aur upr aapko option me selection me jana hai aur wahase extract pe click karna hai and aapka image background se alag hojayega and aapko new layer create karke usme colour daale and aapko extra parts jo background se bach gaye hain wo dikh jayenge aur aap unko erase brush se erase kar sakte ho to iska use karke comment me batao yaar kaisa laga aapko ye tool and follow me for more..
3. PICSART PHOTO STUDIO BACKGROUND ERASER TOOLS

    Isme koi dought nahi ki picsart studio app ko koi nahi janta yaar yahi to ek sahaara hai android photo editors ka jisse ham sab editors apne android phone me photo editing karte aarhe hai aur aage bhi karte rahenge and isi ke kaaran aaj youtube me sabhi photo editing wale youtubers aage bach paaye hai so guys ye ham sab ka favorite photo editing app hai and isko ham hamesha apne photo editing me use karte aarhe hai so mai aapko bataunga ki isme background erasing tool ka use sahi tarike se kaise karna hai...


  • CUTOUT TOOL
  • DRAW ERASER

CUTOUT TOOL Dosto ye tool mai apne sabhi tutorials me use kiya hai jisme mujhe kaafi jaldi background erase karne me madad mili hai and guys is method me aapko apne pic me wo area ko select karna hai jisko aap extract karna chate hai and select ke baad done me click karne par aapka wo area png me save hojayega jo aapko aapke gallary me mil jayega and aapke picsart app ke sticker wale feature me save hojayega, lekin isme aapko full hd me png nahi milega kyuki isme aapke iamge ka quality low hojata hai jisme photo editing me dikkat aasakti jai jo ham editors ke liye thik nahi kyuki hame hamesha high resolution me photo chaiye hota hai to uske liye next method ka use dekhiye..
DRAW ERASER Friends ye tool hame hamare sabse best photo editing app jo hamare android ke liye hai picsart me dekhne ko mil jata hai lekin aap mese bahut log iska use nahi karte hai aur kuch log iska use to karte hai wo h bhi apne pic ko high resolution ke liye jisme brush tool se iamge ke corner me chota sa dot lageke but sahi h ye bhi lekin aapko iske sabhi tools ka use karna aana chaiye jisse aapke photo editing me kaafi improvment aayega and aapko apne hi kaam me maza ayega to iske eraser app ko use krke dekhiye aur iska use karne ke liye aap sabse pehle ek new layer le lijiye and usko apne iamge ke niche wale layer me kar dijiye aur usme koi bhi ek colour le lijiye jaise green colour best hai aur apne pic ko select karke background ko erase karna start kardena hai fir dekhna aapko bilkul detail me background eraseing ka maza ajayega to ye tool maza ayega to comment me jarur batana yar and thanks..

4. TOUCH RETOUCH

    Guys is app me aapko kaafi fayda hone wala hai jaise maine aapko upar dusre apps bataye hai unse ye app bilkul diffrent hai and guys ye kyu hai mai aapko iske aage btaunga ki isme dusre apps ke mukable kaafi acche tool kya hai so chaliye dekhte hai, So guys mai bata dena chahta hu ki is app me aapke background erase nahi hoga balki background me jo bhi unwanted things hai unko aap remove kar sakte ho jaise aap kahin photo click karaye huye hai aur aapke pic me kuch bhi aisa chij aagya hai jisko aap hatana chahte hai to aap isme iske tool se us item ko select karke bahut aasani se remove kar paoge jisse wo item 1 second me remove ho jayega and aapke image se and background se remove hojayega..


HOW TO USE TOUCH RETOUCH

  • USE OF TOUCH RETOUCH APP

Select object remover brush and aapke image me jo bhi unwanted content hai usme is brush ke madad se colour kardo and go ke button par click kardo aapka wo item remove hojayega and isse bhi agar nahi hota hai to aap stamp tool ka use karke us content ko apne image se hata sakte hai. agar iamge me line jaise koi item hai jaise wire hai to aapko ise hatane ke liye line remover ka use karna hai and go pe click karke remove karlena hai so yahi hai iska use..


5.PIXOMATIC PHOTO EDITOR

  Dosto waise to pixomaticall in one photo editor app hai aap isme sahi type ke features ka use kar sakte ho lekin ham iske eraser tool ko use karenge aur dekhenge ki hamare iamge ka background is aap se akise erase hota hai and iska use karna sahi h ya nahi so chaliye dekh lete hai..

PIXOMATIC ERASER TOOL

  • USE OF PIXOMATIC ERASER TOOL

So guys jaise ki ham jaante hai ki pixomatic app me kaafi saare features hai aur ham isse ek awesome pic editing kar sakte hai lekin kya aapko iske earaser tool ka pta hai jisse aap apne image ke background ko kaafi aashani se erase kar paoge, agar nahi pata to isme mai aapko batane ja rha hu so lets get started, So guys aapko apne pic ko pixomatic app me open karna hai and eraser tool select karke apne image me jis background ko chhor ke apne model pe red colour se select kar lena hai like coutlines and go pe press karna hai aur aapke image ka bacground removed hojayega so guys yahi hai iske eraser app ka use.


SO GUYS MAINE ISME AAPKO TOP 5 BACCKGROUND ERASER APPS FOR ANDROID BTAYA HAI TO AGAR AAPKO PASAND AAYA HOGA TO AAP MERE IS POST KO JARUR APNE FRIENDS KE SAATH SHARE KAREN AND MUJHE COMMENT ME BATAYE KI AAPKO KAISA LAGA YE SAARE APPS SO THANKS..

Top 5 Photo editing apps for android 2020| Best photo editing apps for android

5 BEST PHOTO EDITING APPS OF ALL TIME


Hey guys welcome back to SR CREATIONS and guys aajke is new post me ham baat karenge 5 best photo editing apps jo ki hamesha best result dete aarhe hain so guys in top 5 best editing ke list me ham jo use karte hain un apps se bhi maine liya hai jo ki ham editors ke liye ekdam sahi hai aur iska use ham hamesha photo editing me karte hain jaise ki sabse best and easy to use hamara picsart photo studio jo ki hamesha ke liye hi best result dene me aage rahta hai lekin iske bhi kuch khamiya hai and guys duniya me aisa koi chij nahi hota jisme koi khamiya na ho aur agar baat kiya jaye picsart applicaion ki to isme itne features hame milta hai jo bahut kaam ke hain usme se agar kuch khamiya hoti hai to koi problem nahi guys to ham iske features and easy tools ko dekhte huye ise android photoshop keh sakte hain, So guys chaliye dekhte hain hamare top 5 apps for best photo editing.


Dosto sabse pehle number pe hamara jo photo editing app aata hai wo hai


1. Toolwiz Photos - Pro Editor

     Guys Toolwiz photos pro editor ka name agar aap pehle baar sun rahe hai ya phir aapne iska name to suna tha lekin iska use abtak nahi kiya hai to aap ek bahut hi shandar photo editing app ko miss kiye ho guys iske filters and features ke baare me aapko aage bataunga usse pehle aapko iske kuch khaas features ke baare me bata deta hu jo ki aapke photo editing me face ke liye main hai to guys iska facetune feature kaafi hatke hai and awesome feature hai jiska use karke aap apne image se face me pimples and face ko white aur clean kar sakte hain and ye sab automatically hoga sirf one tap me so guys iske aur bhi kuch features hain. Ye app free to download hai jisme kuch in-app purchases hai.


FEATURES


  • Large collection of art filters & magic filters
  • Free online resource like 200+fonts,lens flairs,2000+stickers etc..
  • Face swap filters autotune and beauty features
  • Drawing
  • Red eyes removel etc..

2. Pollar Photo Editor

      Friends agar aap chahte hain ki aapke image me background blur ho like dslr aur wo bhi realisti to aap is app ka use karke bilkul real dslr jaise effect ya blur apne image me add kar sakte ho aur isme aise bahut se features hain jisko mai aapko bataunga lekin iske kuch aweosme features ki baat kar lete hain jo ki hain isme aapko apne image me face clean ke liye auto face detection milta hai iske alava custom overlay and double exposure aap isme kar sakte hain selective area ko aap bright and dark ya light adjust and jo isme feature hain unka use kar sakte ho isme weather se related aapko pngs mil jayenge app me hi and art create kar sakte hai aur apne khud ka filter create karke aap usko apne friends ya social pages me share kar sakte ho so guys ye to hogye khaas features aage aur dekh lete hain. Ye app free to download hai jisme kuch in-app purchases hai.


FEATURES


  • Layer and blending mode mix two or more images
  • Local adjustments include mask and adjust
  • Global adjustments include color,light,vintage etc...
  • Customize your own filters
  • 3. Photo Director Photo editor 2019


      Dosto photo director photo editor 2019 ki baat ki jaye dusre apps ke muqabale to ye kuch alag hai jisme dusre android apps jaise  features to hain lekin iske features kuch professional type se kaam kate hai jisme aapko apne pic me high adjustnebt filters and features add karne ko milenge kyuki guys ye app CyberLink company ne banaya hai jo ki kaafi naami company hai jiske computer softwares bhi hain and video editors se leke photo editors hai jaisa ki ham read kar rahe hai photo director ke baare me chliye kuch feature ki baat karte hain to jaise ka aapko pata hai sabhi android photo editors me collage maker hota hai and isme bhi hai lekin kuch alag hai jo aap iska use karoge to aapko pata chal jayega so dusre features ki baat ki jaye to isme auto brightness and contrast adjustment hai and saturation adjustment diya gaya hai sabse khas baat is app ki hai isme aapko sabhi features ke saath saath content aware tool bhi mil jayega jisko ham is app me content removel tool ke name se jan sakte hai and isme face clean ka bhi option hai so iske features ki list dekhte hain. Ye app free to download hai jisme kuch in-app purchases hai.


FEATURES


  • Pic Editor Tools
  • Photography With Live Effects
  • Crop out objects
  • Photo effects, HDR & layer ediing

4. Picsart Photo Studio Editor

     Friends ab picsart ke baare me kya batau aapko yaar sabhi android photo editors app ka use karte hai and iske saare features filters ki jankari lagbhag mere sabhi editor bhaiyon ko hoga jo iska use karke apna image edit karte honge lekin phirbhi agar baat aati hai top editing apps ki android me to hamara sabse jyda use kiya jaane wala app picsart photo studio kabhi piche nahi hat sakta to chaliye iske baare me bhi kuch baat karte hai iske features kis tarah se sabhi photo editing apps ke muqabale kaam karte hain and koun koun se pro feature hain so sabse pehle baat ki jaye iske tools option ki jisme aapko kaafi saare adjustment tools dekhne ko mil jayenge jisme sabhi tools kaam ke hain isme crop,stamp,stretch,curve,adjustment,tiltshift jaise aur bhi mil jayenge jisme se maine kuch khas tools ke baare me bataya aur isme aapko tool baar me cut out tool milega jiski help se aap apne image ka background kuch hi seconds me erase kar sakte hain and stickers,lens flairs,draw,filters me aapko blur,colorize jaise pro tools dekhne ko mil jayenge chaliye iske features ko dekhllete hain category wise. Ye app free to download hai jisme kuch in-app purchases hai.


FEATURES


  • Adjustment tools
  • Filters with online resources
  • Draw tool
  • Cut out tool 
  • Font and Stickers
  • Editors platform share own creation

5. ADOBE LIGHTROOM MOBILE

      Lightroom mobile kaafi trending me hai jisse sabhi mere editor bhai jaante honge ki 2019 me trend sabse jyda photo retouching and social media me lightroom editing hi faila hua hai jisse ki iske users kaafi jyda ho chuke hain, waise to ye kaafi old and famous company adobe ka hai jisko bade bade editors film makers use karte hain isme movie makers software hain aur adobe photoshop to sab use karte hain mai bhi apne laptop ya pc me isi ka use karte huye aapke liye new backgrounds banata hu so guys ham sab is app ko acchi tarike se jaante hai fibhi mai aapko iske features ke baare me bataunga jaise ki iske kuch khas features hai jisse ki adobe lightroom mobile ka ek alag hi jagah hai hamare android photo ediing ke platform me so guys sabse pehla to isme aap apne photo ko open karte hai and iske filters ka use karke apne image ko save ya export karte hain to aapke photo ka qualiy ya resolution me girawat ya quality low nahi hota hai chahe badh jata hai lekin kam nahi hota and iske kuch awesome filters ke kaaran ye sabhi apps ka baap hai jaise ki iske preset copy paste tool aapko kisi app me nahi milega isme aap kisi dusre ke save kiye huye filters ko apne photo me paste karoge and aapko apne image ko kuch karne ki jarurat nahi hogi and retouching ke liye bhi is app ko koi piche nahi kar sakta hai jaise color enhancements se aap apne photo ko jo chaho wo colour look de skate ho aise hi apne image me clarity lane ke liye iske tool cleaity ka use karke photo clear ho jata hai and nose reduction tool,vintage tool, content remove and selective tool jaise feature bhi iske kaafi laajwab hain so guys cahliye dekhte hai iske features ko category wise. Ye app free to download hai jisme kuch in-app purchases hai.


FEATURES


  • Presets- make dramatic in a single click
  • Color mixer
  • Interactive turorials
  • Selective tools- In Premium
  • Healing brush
  • Raw editing
  • Geometry
  • Advance sharing

Guys is post me maine jo bhi apps bataye hain inka use aap jaur karna jisse ki aapko photo editing me alag experience ho and aapko new android ke photo editing apps ka knowledge ho..

TO AGAR AAPKO YE LIST PASAND AAYA TO MUJHE FOLLOW JARUR KARNA